Accurate throwing is one of the most valuable defensive skills in baseball, and it is far more coachable than raw arm strength. A repeatable throw comes from a chain of small habits: how you grip the ball, where your feet and lead shoulder point, what you look at, and how you finish. This guide breaks those habits down into practical steps that players in the Wellington Baseball Association — and anywhere else in New Zealand — can drill on their own or with a partner. The aim is simple: turn erratic throws into consistent ones that find a teammate’s chest, whether you are fielding a routine grounder at Ian Galloway Park or making a longer relay.
Key Points
- Grip first: a four-seam grip gives the straightest, most stable ball flight.
- Point your sights: land the lead foot and aim the front shoulder directly at the target.
- Aim small: target a logo or glove pocket, not the whole body.
- Finish the same way every time: a consistent release and follow-through breeds accuracy.
- Protect the arm: warm up, do band work and manage throwing volume — a tired arm sails.
Start With a Stable Four-Seam Grip
The four-seam grip is the standard hold for almost every defensive throw because it produces the cleanest backspin. You place your index and middle fingers across the wide part of the seams (the ‘horseshoe’), with the thumb tucked underneath to form a stable tripod. As the ball leaves your hand it spins backward over four seams, which keeps its flight straight and predictable. That matters in Wellington’s frequently windy conditions, where a ball thrown with sideways spin is more likely to tail away from the target.
A common cue is to keep a small visible gap between the ball and your palm so the fingertips, not the palm, do the work. Holding the ball too deep — ‘palming’ it — kills the wrist snap and turns the throw into a weak push.
Common Grip Mistakes to Avoid
- Palming the ball: gripping too deep removes the wrist snap and ‘zip’.
- Off-centre thumb: sliding the thumb to one side adds unwanted spin and makes the ball curve.
- Joint pressure: squeezing with the finger joints rather than the pads reduces feel and control.
- Hunting for seams: fumbling for the grip after catching costs time; practise finding the four-seam hold by feel during glove-to-hand transfers.
| Grip | Typical spin | Effect on a throw | Best use |
|---|---|---|---|
| Four-seam | Clean backspin | Straight, stable flight | Standard defensive throws |
| Two-seam | Lateral movement | Ball can tail or sink off target | Pitching for movement |
| Palm / no gap | Little rotation | Slow and inconsistent | Avoid on defence |
| Cutter | Side spin | Slides away from the target line | Advanced pitching only |
Line Up the Kinetic Chain: Feet, Hips and Lead Shoulder
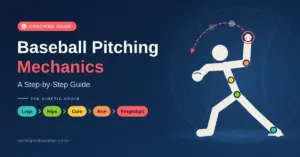
Accuracy is largely a question of where your body is pointing when you release. Think of your lead shoulder and front foot as the sights on a rifle. Set up in an athletic stance with your front shoulder aimed at the target, then step so the lead foot lands in a straight line toward it. For a right-hander, stepping ‘open’ (landing to the left) tends to leave the arm behind and pushes throws to the right; stepping ‘closed’ (across the body) forces you to throw around your torso and misses left. The same alignment principles underpin good baseball pitching mechanics, so time spent here pays off across the whole game.
The Power-T Position
The ‘Power-T’ is the checkpoint just before release, where the throwing arm and glove arm extend to form a T with the torso. It gives you a consistent arm slot to repeat.
- Elbow height: keep the throwing elbow at roughly shoulder height, not dropped below it.
- Glove action: pull the glove in toward your chest to help rotate the trunk through the throw.
- Front-foot direction: land with the toe pointing at the target, not out toward the sideline.
- Core drive: let your midsection, not just the arm, pull the upper body forward.
Aim Small: Visual Focus and Target Training
A reliable way to tighten your throws is to pick a small target rather than the whole person. Instead of aiming at a teammate’s body, aim at the logo on their chest or the pocket of their glove. The logic is straightforward: if you aim at a small point and miss slightly, you still land somewhere on the chest; if you aim at the whole body and miss, the ball can end up in the dirt. Selectors at representative trials often watch for exactly this kind of controlled targeting during warm-ups.
Simple Visual-Focus Drills
- Button drill: partners nominate a specific button, zip or logo to hit each throw.
- Net zones: a nine-pocket throwing net lets you rehearse hitting specific squares.
- Moving glove: a partner shifts the glove target to build accuracy on the move.
- Eyes on target: keep your eyes locked on the aim point until the ball is caught, rather than watching your own arm.
The Aim–Ready–Fire Practice Routine
Consistency is built through calm, high-repetition reps that isolate each phase of the throw. A useful three-count is Aim (align the lead shoulder), Ready (reach the Power-T), Fire (release and follow through across the opposite hip). Rehearsing the throw in segments prevents the rushing that causes so many errors, and practising in front of a mirror or a phone camera lets you check your arm slot. Slotting a few focused sets into your regular baseball drills for youth players keeps the mechanics fresh without long, tiring sessions.
Sharpening the Release Point
The release point — the moment the ball leaves your fingertips — is the most variable part of the throw, so short ‘wrist-flick’ reps from a few metres away help groove it.
- Releasing late/high: lets the ball sail and stay up.
- Releasing early/low: short-hops the receiver.
- The finish: bring the throwing hand down toward the opposite hip every time.
- Little and often: a set of short, focused flicks daily builds fingertip feel faster than one long session.
Footwork for Game-Speed Throws
Throwing on a quiet field is very different from throwing with a runner bearing down. Under pressure the body reverts to habit, so your footwork has to be drilled at game speed. Infielders use quick shuffle steps to line up the hips; outfielders use a ‘crow hop’ — a directional skip that builds momentum for longer throws and resets the lead shoulder. Working through these patterns for your position, whether that is a relay from the outfield or a snap throw from behind the plate, keeps accuracy intact when the play speeds up.
| Position | Footwork key | Goal |
|---|---|---|
| Shortstop | Side shuffle | Quick, aligned transfer to first |
| Outfield | Crow hop | Momentum for distance and carry |
| Catcher | Quick pivot / footwork exchange | Fast, accurate throw to second |
| Pitcher | Fielding practice (PFP) | Controlled throw to any base |
Catchers in particular rely on a compact exchange and clean footwork; you can read more about that role in our guide to the catcher in baseball.
Arm Care and Shoulder Health
An inaccurate throw is often a tired throw. When the small stabiliser muscles of the rotator cuff fatigue, the arm slot drops and the ball sails. A short resistance-band routine (internal and external rotations) before throwing helps ‘switch on’ those muscles, and a proper dynamic warm-up of arm circles and trunk rotations prepares the joint for the stress of throwing. Overuse is the bigger long-term risk: the widely used Pitch Smart guidelines — a joint program from Major League Baseball and USA Baseball, developed with the American Sports Medicine Institute — set age-based pitch counts and required rest days that many New Zealand coaches follow to protect young arms. Pairing sensible workloads with the basics in our baseball safety tips for kids in Wellington keeps players healthy and throwing well.
Everyday Arm-Care Habits
- Dynamic warm-up: loosen the arm and trunk before you throw, not after.
- Band work: a few minutes of controlled rotator-cuff rotations most days.
- Manage volume: track how much you throw and build in rest days.
- Respect pain: stop for sharp elbow or shoulder pain and check mechanics with a coach.
Long Toss for Strength and Trajectory Control
Long toss develops both arm strength and a feel for trajectory. A typical session stretches out to a comfortable maximum distance with slightly arced throws, then works back in with harder, flatter ‘line-drive’ throws aimed at the partner’s chest. Coming back to the shorter 20–30 metre distance of an infield throw afterwards, the ball tends to feel easier to control. Keep every throw purposeful — aim at your partner rather than simply reaching them.
| Phase | Approx. distance | Focus |
|---|---|---|
| Warm-up | 10–20 m | Grip and easy release |
| Stretch-out | 30–60 m | Fluid mechanics, gentle arc |
| Pull-in | Working back to ~20 m | Flat line drives to the chest |
| Cool-down | 10 m | Soft, easy finishing throws |
Use Video and Gamified Practice
A smartphone is one of the cheapest coaching tools available. Filming your throw from behind and from the side, ideally in slow motion, exposes flaws that are invisible in real time — ‘arm drag’ (the hand trailing the elbow) or the front side ‘flying open’ before the foot lands. Apps such as OnForm and V1 Sports let you review footage frame by frame, and comparing your motion to that of higher-level players, including the national Diamondblacks or MLB athletes, helps you spot where energy is leaking. This kind of frame-by-frame review is part of the wider rise of Wikipedia-documented sports analytics in coaching, where data and video guide technical decisions.
Because repetitive drilling gets dull, turning practice into a game keeps focus high. ‘Around the Horn’ relays, where the ball must travel catcher–third–second–first–home without a miss, build accountability, while a simple points system (more points for a chest-high throw, penalties for a miss) adds friendly pressure that mirrors game tension.
Handle the Throwing ‘Yips’ and Build Confidence
Accuracy is partly mental. After a bad throw — especially one that costs a run — some players develop a fear of throwing, often called the ‘yips’. A short reset routine helps: take a breath, mentally park the mistake, and lock back onto the next play. Coaches who reward good process (correct grip and footwork) rather than only the result help players stay relaxed and keep throwing freely.
Accuracy Checklist
- Set the four-seam grip by feel on every catch-and-throw.
- Step so the front foot points at the target.
- Reach a clean Power-T with the elbow near shoulder height.
- Lock your eyes on a small aim point until the ball is caught.
- Follow through down toward the opposite hip.
- Warm up and do rotator-cuff band work before throwing.
- Track your throwing volume and take rest days.
Bringing It Together
Throwing accuracy is built quietly, in the reps between games: a stable four-seam grip, feet and lead shoulder pointed at the target, eyes fixed on a small aim point, a consistent finish, and an arm that is warmed up and well rested. Add honest video review and a little competitive pressure in practice, and reliable throws become a habit rather than a hope. Master the fundamentals and your defence can become something your team counts on all season.
Sources
Frequently Asked Questions (FAQ)
What is the best grip for accuracy in windy conditions?
The four-seam grip. Its clean backspin gives the straightest, most predictable flight and helps the ball resist tailing in the wind.
How often should I practise throwing accuracy?
Short, frequent sessions beat occasional long ones. Around 15 minutes of focused target work several times a week keeps the mechanics sharp without overloading the arm.
Why do my throws keep sailing high when I throw hard?
Sailing high usually means the front side is flying open too early or you are releasing the ball late in the arm’s arc. Staying closed a fraction longer and finishing down toward the opposite hip helps.
Are resistance bands really worth it for accuracy?
Yes. Bands strengthen the small rotator-cuff muscles that keep the arm slot stable. When those muscles tire, the slot drops and throws start to sail, so the work is preventative as much as performance-related.
How do I stop short-hopping the first baseman?
Short hops come from a low release. Focus on finishing tall and aiming slightly higher — around the receiver’s head height — so the ball carries into the chest rather than the dirt.
Is long toss safe for junior players?
It can be, provided throws stay on a flatter line-drive trajectory and volume is managed with rest days. Avoid high, arcing ‘rainbow’ throws, which add strain to a developing shoulder, and stop if there is any sharp pain.